A wobbly refrigerator door handle can be more than just an annoyance; it can be a genuine safety hazard, increasing the risk of dropping food items or even damaging the door itself. Fortunately, repairing a loose refrigerator door handle is often a straightforward task that most homeowners can tackle with basic tools and a little patience. This guide will walk you through the common causes of a loose handle, the tools you’ll need, and a clear, step-by-step process to get your refrigerator handle firm and secure once more.

Understanding Why Your Refrigerator Door Handle Comes Loose
Over time, it’s natural for parts of your refrigerator to experience wear and tear, and the door handle is no exception. Understanding the root cause of the problem is the first step toward an effective repair.
- Loose or Stripped Screws: The most frequent culprit behind a wobbly handle is simply loose screws. Constant pulling and the vibration from daily use can gradually loosen the fasteners that hold the handle in place. If these screws are repeatedly overtightened or removed, their threads can become stripped, preventing them from securing the handle properly.
- Wear and Tear from Frequent Use: Every time you open your refrigerator, stress is placed on the handle and its mounting points. This continuous strain can lead to material fatigue in the handle itself or the components it attaches to, causing it to loosen over time.
- Damaged Handle Brackets or Mounting Hardware: Beyond the screws, the brackets or studs that anchor the handle to the door can suffer damage. Cracks, bends, or other forms of deterioration in these critical components will inevitably result in a loose or unstable handle, regardless of how tight the screws are.
- Improper Installation: Sometimes, the issue stems from the initial installation. If the handle was not installed correctly or the screws weren’t adequately tightened from the start, it can become loose much sooner than expected. Using the wrong type of fasteners or misaligning the handle can also contribute to instability.
- Heavy Pulling or Door Slamming: While modern refrigerators are built for durability, consistently pulling on the handle with excessive force or allowing the door to slam shut can accelerate wear. This aggressive treatment puts undue stress on the handle’s attachment points, leading to premature loosening or breakage.
|
Our Picks for the Best Refrigerator in 2026
As an Amazon Associate I earn from qualifying purchases.
|
||
| Num | Product | Action |
|---|---|---|
| 1 | GE GTS18HGNRWW 28 Inch Top Freezer Refrigerator with 17.5 Cu. Ft. Capacity, Reversible Hinges, Gallon Door Shelves, Adjustable Glass Shelves, Frost Free |

|
| 2 | Frigidaire, 2 Door Apartment Size Refrigerator with Freezer, 7.5 cu ft, Adjustable Spill-Proof Shelves, Crisper Bins, Platinum Silver, Garage Ready |
|
| 3 | Whirlpool WRS321SDHZ 21 Cu. Ft. Stainless Side-by-Side Refrigerator |
|
| 4 | Frigidaire, 2 Door Apartment Size Refrigerator/Freezer Combo, 7.5 cu ft, Platinum Series, Stainless, 23" D x 21.5" W x 55.5" H |
|
| 5 | Samsung 17.5 cu. ft. Smart Counter Depth 3-Door French Door Refrigerator, Stainless Steel, RF18A5101SR/AA |
|
| 6 | GE Profile 28.7 cu. ft. 4-Door French Door Refrigerator in Stainless Steel with Dual-Dispense Autofill Pitcher PGE29BYTFS |
|
| 7 | Frigidaire EFR786 Retro Apartment Size Refrigerator with Top Freezer - 2 Door Fridge with 7.5 Cu Ft of Storage Capacity, Adjustable Spill-Proof Shelves, Door & Crisper Bins, Black |
|
| 8 | Electactic Mini Fridge 130 Can Beverage Refrigerator Cooler, 3.2 Cu.Ft Drink Fridge for Soda Wine Beer, Adjustable Temperature Control for Home Office, Black |
|
| 9 | NEWBULIG Mini Fridge with Freezer 3.2 Cu.Ft Small Refrigerator for Office, Dorm, Small Fridge with Adjustable Thermostat, Energy Saving, Singel Door, Black |
|
| 10 | ARCTIC CHEF Mini Refrigerator, Compact Freezer Compartment, Adjustable Thermostat Control, Reversible Door, Ideal Fridge for Dorm, Office, Apartment, Platinum Stainless, 3.2 Cubic Feet |
|
Tools and Materials You’ll Need
Before you begin any repair work, gathering the right tools is essential. Having everything at hand will make the process smoother and more efficient.
- Screwdrivers: You’ll likely need both Phillips-head and flathead screwdrivers. Many refrigerator handles use one of these common screw types.
- Allen Wrenches (Hex Keys): For handles secured with set screws, an Allen wrench is crucial. Common sizes for refrigerator handles are often 3/32-inch or 1/8-inch. It’s helpful to have a set with various sizes.
- Replacement Screws or Handle: If your existing screws are stripped or the handle itself is cracked or broken, you’ll need replacements. Ensure they match your refrigerator’s make and model.
- Soft Cloth: A soft cloth can protect your refrigerator’s surface from scratches and can be useful for cleaning the handle area before and after the repair.
- Thread Locker (Optional): A small amount of thread-locking fluid can be applied to screws to prevent them from vibrating loose again, providing a more durable fix.
- Flashlight: Essential for spotting hidden screws or examining mounting points in dimly lit areas.
Step-by-Step Guide to Fixing Your Loose Refrigerator Door Handle
Addressing a loose refrigerator handle is often a straightforward DIY project. Follow these steps carefully to ensure a secure and lasting repair.
-
Safety First: Unplug Your Refrigerator
Before performing any repair on an appliance, always prioritize safety. Unplugging your refrigerator eliminates the risk of electrical shock, even for seemingly minor repairs. While some might consider this step optional for handle tightening, it’s a crucial best practice for any appliance maintenance. -
Inspect the Handle and Identify the Fasteners
Carefully examine your refrigerator door handle. Handle designs vary significantly by manufacturer and model.- Visible Screws: Some handles have screws visible on the ends or sides, usually accessible when the door is open. These might be Phillips or flathead screws.
- Hidden Set Screws: Many modern handles feature small set screws, often located on the underside of the handle or on its ends. These typically require an Allen wrench (hex key) to loosen or tighten. Look for tiny holes where a wrench would fit.
- Slide-on Handles: Some handles slide onto mounting studs and are secured by internal fasteners, which may only become visible once the handle is partially removed. These often require loosening a set screw or two first, then lifting the handle upwards to detach.
-
Choose the Right Tool
Based on your inspection, select the appropriate screwdriver or Allen wrench. Using the correct tool prevents stripping the screw heads or damaging the fasteners, which can complicate the repair significantly. Gently insert the tool to ensure a snug fit. -
Tighten Loose Screws
Once you’ve identified the loose screws and selected the right tool, begin tightening them by turning clockwise. Apply firm, steady pressure. Be careful not to overtighten, as this can strip the screw threads in the handle or the door, making the problem worse or requiring more extensive repairs. Tighten until the handle feels secure and no longer wobbly.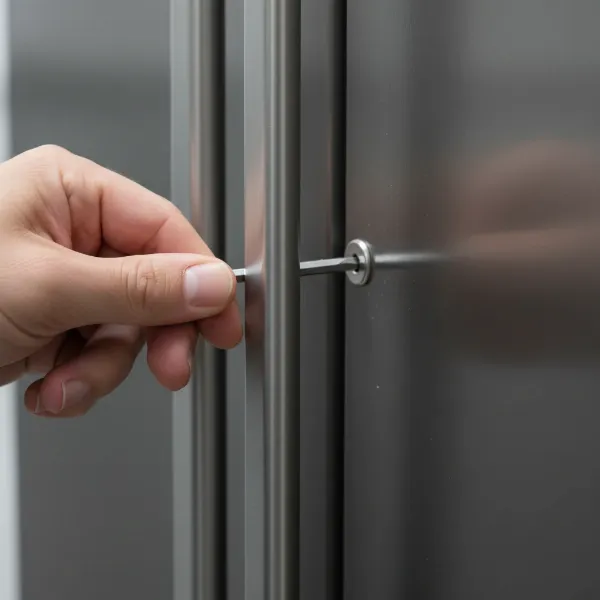 A hand using an Allen wrench to tighten a set screw on a modern stainless steel refrigerator door handle. The handle is sleek, and the focus is on the repair process.
 -
Replace Stripped or Damaged Screws
If, after tightening, the handle still feels loose, or if the screw head spins without engaging, the screw itself might be stripped or damaged.- Remove: Carefully unscrew and remove the damaged fastener.
- Replace: Take the damaged screw to a hardware store to find an exact match in terms of length, diameter, and thread type. Insert the new screw and tighten it carefully. If the hole itself is stripped, you might need a slightly larger screw or to consider a thread repair kit, but this is less common for handle fasteners.
-
Replace a Broken or Severely Damaged Handle (if necessary)
If the handle itself is cracked, broken, or if the mounting hardware is beyond simple tightening or screw replacement, you’ll need to replace the entire handle.- Remove the Old Handle: Typically, this involves loosening all visible and/or hidden set screws and then carefully sliding the handle off its mounting studs. Refer to your refrigerator’s owner’s manual for specific instructions, as removal methods can vary.
- Install the New Handle: Align the new handle over the mounting studs or attachment points. Ensure it sits flush against the door. Insert and tighten all screws securely, again being mindful not to overtighten. Ensure the new handle matches your refrigerator’s model for proper fit and aesthetic.
-
Test the Repair
Once all screws are tightened or a new handle is installed, give the handle a gentle but firm tug. It should feel solid and secure, with no noticeable wobble or play. Reconnect your refrigerator to power if you unplugged it.
Pro Tips for a Durable Repair and Handle Longevity
To ensure your refrigerator handle remains secure and functional for years to come, consider these expert recommendations.
- Use Thread Locker: For screws that tend to loosen frequently, a small dab of non-permanent thread-locking fluid can be incredibly effective. This liquid hardens to fill the gaps in the screw threads, preventing them from vibrating loose, yet still allowing for future removal if needed.
- Consult Your Owner’s Manual: Your refrigerator’s owner’s manual is an invaluable resource. It provides specific instructions, diagrams, and part numbers tailored to your exact model, which can be particularly helpful for unique handle designs or when sourcing replacement parts.
- Avoid Overtightening: While it might seem counterintuitive, overtightening screws can be as detrimental as leaving them loose. Excessive force can strip the screw threads, crack plastic components, or deform metal parts, leading to more significant and costly repairs down the line. Tighten until snug, then give a quarter turn.
- Regular Maintenance Checks: Make it a habit to periodically check your refrigerator and freezer door handles for any signs of loosening. A quick check and a minor tightening can prevent a small wobble from escalating into a broken handle. Teaching everyone in the household to open the door gently also extends the handle’s life.
When to Call a Professional Appliance Technician
While many loose handle issues are DIY-friendly, there are situations where professional help is warranted.
- Severely Damaged Internal Hardware: If the mounting studs inside the door are broken, or if the internal structural components are compromised, a professional technician will have the specialized tools and expertise to address these more complex repairs.
- Uncertainty or Discomfort: If you’re uncomfortable with the repair process, unsure about identifying the fasteners, or worried about causing further damage, it’s always best to call a professional. Appliance technicians can diagnose and fix the issue safely and efficiently.
- Persistent Problems: If you’ve attempted the DIY fix and the handle continues to loosen or break, there might be an underlying issue that requires a more in-depth diagnosis from an experienced professional.
Conclusion
A loose refrigerator door handle can disrupt the flow of your kitchen and even pose a safety concern, but with a few simple tools and a clear understanding of the steps involved, you can often restore its stability yourself. By carefully inspecting the handle, choosing the right tools, and tightening or replacing components as needed, you’ll enjoy a secure and fully functional appliance. Remember to prioritize safety and don’t hesitate to seek professional assistance if the task feels beyond your comfort level. What other small appliance repairs have you successfully tackled in your home?
Frequently Asked Questions
How often should I check my refrigerator handle screws?
It’s a good practice to check your refrigerator door handle screws every six months to a year, especially if your refrigerator sees heavy use. A quick visual inspection and a gentle wiggle can help you catch any loosening before it becomes a significant problem.
Can I use super glue to fix a loose handle?
Using super glue or similar adhesives is generally not recommended for fixing loose refrigerator handles. While it might offer a temporary fix, it makes future repairs or replacements much more difficult, as the handle will be permanently bonded to the door or screws. Mechanical fasteners like screws are designed for secure, removable attachments.
What if my handle doesn’t have visible screws?
If you don’t see any obvious screws on your refrigerator handle, it likely uses hidden set screws or a slide-on mechanism. Look carefully on the underside or ends of the handle for small holes that would fit an Allen wrench (hex key). You might need a flashlight to locate them.
Is it expensive to replace a refrigerator door handle?
The cost to replace a refrigerator door handle varies depending on the brand, model, and material of the handle. Simple plastic handles might be inexpensive, while custom or stainless steel handles for high-end refrigerators can be more costly. Labor costs for professional installation would be an additional expense.