Few things are as frustrating as a refrigerator door that refuses to stay shut, swinging open unexpectedly, or failing to seal properly. This common household annoyance isn’t just a minor inconvenience; it can lead to higher energy bills, spoiled food, and unnecessary wear and tear on your appliance. A perfectly level refrigerator is key to its optimal performance and longevity.

This guide will walk you through everything you need to know about leveling your refrigerator, from understanding why it matters to a step-by-step adjustment process. We’ll also cover door alignment and common troubleshooting tips, ensuring your fridge doors close smoothly and securely every time.
Why a Level Refrigerator Matters
An unlevel refrigerator isn’t just an aesthetic issue; it impacts the appliance’s core functions and efficiency. When your fridge isn’t level, its doors may not close completely, creating gaps that allow cold air to escape and warm air to enter. This forces the compressor to work harder, consuming more energy and potentially shortening the unit’s lifespan.
Beyond energy waste, an uneven refrigerator can hinder the proper circulation of refrigerant, leading to inefficient cooling and potential pooling of the coolant in certain areas. It also puts uneven stress on the door hinges, which can cause them to sag over time, further exacerbating door swing issues. Ensuring your refrigerator is level is a foundational step in maintaining its performance, preserving your food, and preventing costly repairs.
Essential Tools You’ll Need
Before you begin, gathering the right tools will make the leveling process much smoother. You likely have most of these items around your home already:
- Bubble Level: A standard carpenter’s level (ideally 2-3 feet long) is best for checking the overall level of the appliance. A smaller torpedo level can be useful for individual door alignment.
- Adjustable Wrench or Pliers: These are crucial for turning the leveling legs or rollers, which often have hexagonal heads.
- Screwdriver Set: You might need a flathead or Phillips screwdriver, and possibly a hex key (Allen wrench) or nut driver, depending on your refrigerator model’s specific adjustment mechanisms.
- Wood or Plastic Shims: These thin wedges are invaluable for compensating for extremely uneven floors, especially under non-adjustable rear rollers.
- Safety Gloves (Optional): To protect your hands during adjustments and when moving the refrigerator.
- Helper: Moving a heavy appliance is best done with an extra pair of hands for safety and ease.
Step-by-Step: Leveling Your Refrigerator
Leveling your refrigerator is a straightforward process that typically involves adjusting its front legs or rollers. Follow these steps for best results:
1. Safety First
Table is empty.Always start by unplugging your refrigerator from the electrical outlet. This prevents any accidental electrical hazards while you’re working around the appliance.
2. Empty and Move (Slightly)
Remove any heavy items from the refrigerator shelves and door bins. If your refrigerator needs to be pulled out from the wall to access the rear leveling components, do so gently, preferably with a helper, to avoid damaging your floor or the appliance.
3. Locate Leveling Components
Most refrigerators have adjustable leveling legs or rollers at the front corners, hidden behind a removable kickplate or grille at the bottom. The rear usually has fixed rollers, though some models may have adjustable rear legs. Consult your owner’s manual if you have trouble locating these.
4. Assess the Current Level
Place your bubble level on top of the refrigerator, both front-to-back and side-to-side. Observe the bubble to determine which areas need to be raised or lowered. For optimal door closure, many appliance manufacturers recommend that the front of the refrigerator be slightly higher than the back – typically about 1/4 inch. This slight forward tilt allows gravity to help the doors swing closed automatically.
5. Adjust the Front Leveling Legs
If your refrigerator has a front kickplate or grille, carefully remove it to expose the adjustable feet or rollers. With your adjustable wrench or pliers, turn the leveling legs. Turning them clockwise will raise that corner of the refrigerator, while turning them counter-clockwise will lower it. Make small adjustments, then re-check with your level, aiming for that slight upward tilt at the front.
6. Address Uneven Floors (If Necessary)
If your floor is significantly uneven, or if your refrigerator’s rear feet are not adjustable and the back is too low, you might need shims. Gently tilt the refrigerator back with a helper and slide wood or plastic shims under the rear rollers or fixed legs to achieve the desired height. Ensure the shims are securely in place before carefully lowering the refrigerator.
7. Re-check and Fine-tune
Once you’ve made adjustments, give the refrigerator a slight push to ensure it’s stable and doesn’t rock. Re-check the level both front-to-back and side-to-side. Open and close the doors a few times to confirm they swing shut smoothly and seal tightly without rebounding. If needed, make further small adjustments until you achieve perfect stability and door function.
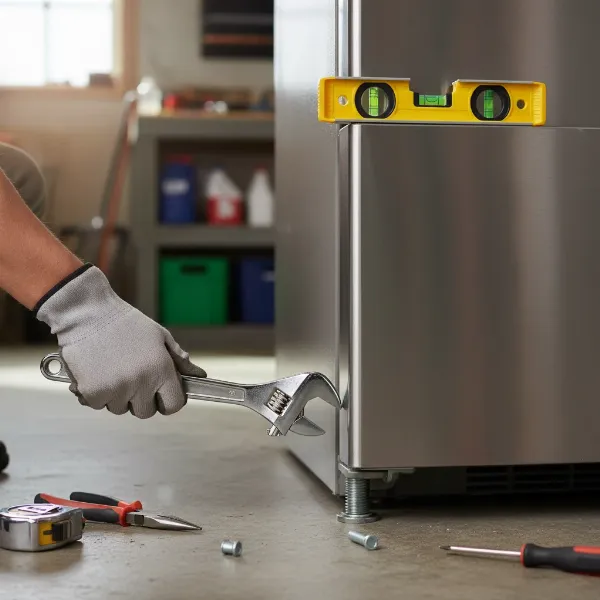 Adjusting refrigerator leveling feet with a wrench to achieve proper alignment and prevent door swings
Aligning Refrigerator Doors for a Perfect Seal
Even after the main body of the refrigerator is level, you might find that the individual doors are still slightly misaligned, particularly with side-by-side or French door models. This requires a separate adjustment of the door hinges.
Locate Door Alignment Screws
Many refrigerator doors have alignment screws, usually located at the bottom hinge of each door. You might need to open the door to access these. Some models may have a small cover that needs to be removed.
Adjusting Door Height
Using the appropriate tool (often a hex key, adjustable wrench, or screwdriver), turn the alignment screw. Turning it clockwise typically raises the door, while turning it counter-clockwise lowers it. Make minor adjustments, then step back and check the alignment. The goal is to have the tops of the doors perfectly even, with no more than a 1/4-inch height difference between them.
Check for Proper Seal
A crucial step is to test the door seal. Open the door and place a dollar bill halfway in, then close the door. If you can easily pull the bill out, the seal isn’t tight enough in that spot, and further adjustment or inspection of the gasket may be needed. Repeat this test at various points around the door.
Troubleshooting Other Causes of Door Swings
Sometimes, a door swing isn’t solely due to an unlevel refrigerator. Here are other common culprits and how to address them:
- Damaged or Dirty Door Gasket (Seal): The rubber gasket around the door forms the airtight seal. If it’s dirty, cracked, or hardened, it won’t seal properly. Clean the gasket regularly with warm, soapy water. If it’s stiff, try gently warming it with a hairdryer to make it more pliable, then press it firmly back into its groove. If damaged, it will need replacement.
- Loose or Damaged Hinges: Over time, hinges can become loose or even bent, causing the door to sag or operate improperly. Tighten any visible hinge screws. If hinges appear damaged, they may need to be replaced.
- Overloaded Door Shelves: Heavy items stored in the door shelves can pull the door down, putting strain on the hinges and affecting its balance. Try rearranging contents, moving heavier items to the main shelves.
- Internal Obstructions: Ensure no food items, boxes, or misplaced shelves are protruding and physically blocking the door from closing completely.
- Worn Door Closer Cams: For persistent “lazy” doors that close most of the way but don’t quite seal shut on their own, worn-out door closer cams might be the issue. These small parts, located around the bottom hinge pin, help the door snap shut. Replacing them is a more involved repair but can be a lasting solution.
> “A perfectly leveled refrigerator is more than just good aesthetics; it’s a foundational element for optimal food preservation and energy efficiency. Overlooking this simple maintenance can lead to unnecessary costs and premature appliance wear.” – John Smith, Senior Appliance Technician
Conclusion
A refrigerator that closes properly and seals tightly is essential for maintaining food freshness, preventing energy waste, and extending the life of your appliance. While a swinging or unsealed door can be a nuisance, leveling and aligning your refrigerator is a manageable DIY task that can yield significant benefits. By following these steps and understanding the common issues, you can ensure your refrigerator operates at its best. Regular checks and prompt adjustments will keep your kitchen running smoothly for years to come.
What steps will you take today to ensure your refrigerator stands perfectly level?
Frequently Asked Questions
How often should I check my refrigerator’s level?
It’s a good practice to check your refrigerator’s level once or twice a year, or whenever you notice issues like the door swinging open, not sealing properly, or the appliance rocking. Floor settling or heavy use can gradually alter its position.
Can an unlevel refrigerator really cause problems beyond door swings?
Yes, an unlevel refrigerator can lead to several problems, including reduced cooling efficiency, increased energy consumption, coolant pooling, and accelerated wear on the compressor and door gaskets, potentially shortening the appliance’s lifespan.
What if my floor is very uneven?
For very uneven floors, you may need to use sturdy shims (wood or hard plastic) under the leveling legs or rollers, especially the fixed rear ones. Ensure the shims are stable and securely placed to prevent any wobbling.
Do all refrigerators have adjustable leveling legs?
Most modern refrigerators come with adjustable leveling legs or rollers at the front. Some models may also have adjustable rear legs, while others rely on fixed rollers at the back. Always consult your refrigerator’s owner’s manual for specific instructions for your model.
When should I call a professional?
You should call a professional if you’ve followed all the leveling and alignment steps and the doors still don’t close or seal correctly, if you suspect a damaged internal component like a worn hinge or cam, or if you’re uncomfortable performing the adjustments yourself.