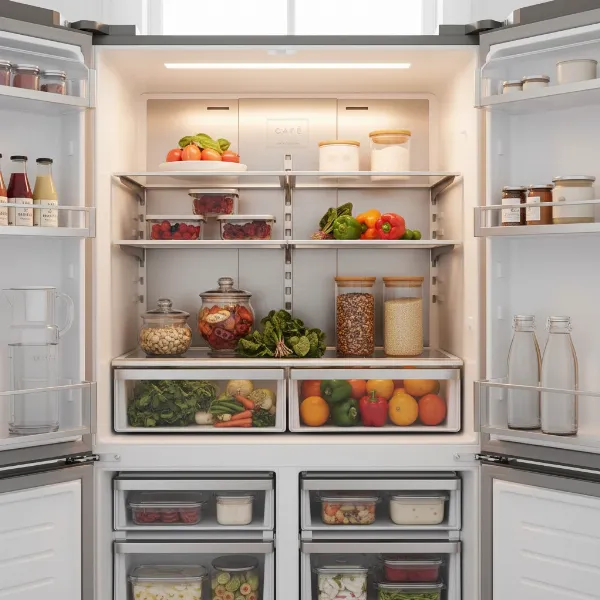
Is your freezer slowly transforming into an arctic cave, filled with more ice than actual food? A thick layer of frost not only shrinks your usable storage space but also forces your appliance to work harder, driving up energy bills and potentially shortening its lifespan. Defrosting your freezer might sound like a daunting, messy chore, but with the right approach and a few clever tricks, you can tackle it efficiently and keep the dreaded water mess at bay. This guide will walk you through everything you need to know to achieve a sparkling, ice-free freezer without the headache.
Why Defrosting Your Freezer is a Must
Regular freezer defrosting isn’t just about aesthetics; it’s crucial for the optimal performance and longevity of your appliance.
- Boosts Energy Efficiency: Ice acts as an insulator, making your freezer work overtime to maintain cold temperatures. By removing this buildup, your freezer operates more efficiently, consuming less energy and lowering your utility bills.
- Maximizes Storage Space: Every inch of ice takes away valuable space where you could be storing your frozen goods. A defrosted freezer provides maximum capacity, allowing for better organization and more effective storage.
- Preserves Food Quality: Excessive frost can lead to freezer burn, degrading the quality, texture, and taste of your food. A properly defrosted freezer helps maintain consistent temperatures, better preserving your edibles.
- Extends Appliance Lifespan: When a freezer struggles against ice buildup, its components are under constant strain. Regular defrosting reduces this stress, preventing potential malfunctions and extending the life of your appliance.
Essential Preparations for a Spotless Defrost
The key to a mess-free defrost lies in thorough preparation. Don’t rush this stage; it saves time and effort in the long run.
- Emptying and Storing Food Safely: This is the first and most critical step. Remove all frozen items. For short defrosting times (a few hours), insulated coolers packed with ice or ice packs will suffice. For longer durations, consider transferring food to a neighbor’s freezer or a secondary freezer if you have one. This is also an excellent opportunity to discard any expired or freezer-burned items.
- Gathering Your Mess-Fighting Arsenal: Equip yourself with the right tools:
- Plenty of old towels and sponges: For absorbing meltwater.
- Shallow pans or baking sheets: To catch water inside and outside the freezer.
- A plastic scraper or wooden spoon: Essential for gently removing loosened ice. Never use metal or sharp objects.
- A bucket: For larger volumes of water if your freezer has a drain.
- Baking soda and warm water: For post-defrost cleaning.
- Newspaper or plastic sheeting: To protect your floor around the freezer.
- Power Off and Position: Unplug your freezer to ensure safety and allow the melting process to begin. If your freezer is small or portable, moving it to an area with easy access to a drain (like a garage or utility room) can simplify cleanup. For larger units, place towels or plastic liners on the floor in front of and around the base of the freezer to catch any drips or overflow. If your freezer has a drainage hose, position a low basin or bucket underneath it. You can even slightly tilt the freezer back by placing shims under its front legs to encourage water to flow towards the drain.
Step-by-Step Methods for a Clean Defrost
Once prepared, you can choose a defrosting method that suits your schedule and the extent of ice buildup.
- The Patient Power-Off Method: This is the simplest and safest approach. After emptying and unplugging, simply leave the freezer door open and allow the ice to melt naturally. This method requires the most time (anywhere from a few hours to a full day, depending on ice thickness and ambient room temperature), but it involves minimal intervention. Regularly swap out soaked towels and empty water pans.
- Accelerating with Hot Water (Steam Method): To speed things up, place bowls or pans of steaming hot (but not boiling) water inside the freezer. Close the door to trap the steam. The warmth and moisture will help loosen the ice from the walls. Place thick folded towels under the hot containers to protect shelves from heat. Replace the hot water every 10-15 minutes as it cools. As the ice softens, you can gently pry it away with a plastic scraper.
- Speeding Things Up with a Fan: Position a portable fan outside the freezer, angled towards the open door. Circulating room-temperature air directly into the compartment can significantly accelerate the melting process, especially effective in warmer environments or for deep freezers in a garage.
- Gentle Scraping for Stubborn Ice: As the ice begins to soften and detach, use your plastic scraper or wooden spoon to gently chip away larger pieces. Focus on the edges first. Never force the ice, as this can damage the freezer’s interior lining or cooling coils.
- Methods to Absolutely Avoid: For your safety and to prevent irreparable damage to your appliance, never use:
- Sharp objects like knives, ice picks, or screwdrivers. These can puncture the freezer walls, damaging refrigerant lines or electrical components.
- Hairdryers or heat guns. While they might seem like a quick fix, the combination of electricity and water creates a severe electrocution risk. Excessive heat can also warp or melt the interior plastic of your freezer.
Mastering Meltwater Management
Controlling the meltwater is key to a mess-free defrost. Be proactive and attentive throughout the process.
- Strategic Towel Placement: Line the bottom of the freezer with several layers of old towels to absorb the initial melt. If your freezer has shelves, stuff rags or smaller towels onto them to catch drips from above. Regularly wring out and replace saturated towels.
- Utilizing Drainage Systems: If your freezer is equipped with a drain plug or hose, ensure it’s open and directed into a bucket or shallow pan. Monitor this container frequently and empty it as needed to prevent overflowing.
- Continuous Monitoring and Wiping: Stay near the freezer during the defrosting process. As ice melts, wipe up puddles and loose ice chunks immediately with sponges and towels. This prevents water from pooling and potentially seeping onto your floor.
Post-Defrost Cleaning and Prevention
After all the ice is gone and the water is cleaned up, a final clean and preventative measures will keep your freezer in top condition.
- Thorough Cleaning: Mix a solution of one tablespoon of baking soda with four cups of warm water. Use a soft cloth dipped in this solution to wipe down the interior walls, shelves, and door seals. This not only cleans but also neutralizes any lingering odors.
- Drying Completely: Ensure the entire interior of the freezer is completely dry before plugging it back in. Any residual moisture can quickly refreeze and start the ice buildup process anew.
- Preventing Future Ice Buildup:
- Check Door Seals: Inspect your freezer door seals (gaskets) for cracks or gaps. A faulty seal allows warm, moist air to enter, causing rapid frost formation. You can test this by closing the door on a piece of paper; if you can pull it out easily, the seal might need replacing.
- Proper Food Storage: Ensure all food items are sealed in airtight containers or bags before placing them in the freezer. This minimizes moisture release.
- Avoid Overloading: While tempting, overfilling your freezer can obstruct airflow and push the door open slightly, leading to frost.
- Don’t Leave the Door Open: Minimize the time the freezer door is open, and ensure it’s completely shut after each use.
How Often Should You Defrost Your Freezer?
The frequency of defrosting depends on your freezer type and usage habits.
Most experts recommend defrosting manual-defrost freezers at least once a year, or more frequently if you notice ice buildup exceeding ¼ to ½ inch in thickness. If your freezer is a “frost-free” model, manual defrosting is generally not required as these units have an automated system to prevent ice accumulation. However, a quick manual clean once or twice a year is still beneficial to maintain optimal hygiene and check for any minor issues. Factors like high humidity in your environment or frequent door openings can accelerate ice formation, necessitating more frequent defrosts.
Conclusion
Defrosting your freezer doesn’t have to be a dreaded, messy chore. By taking a methodical approach to preparation, using safe and effective melting techniques, and diligently managing meltwater, you can transform your icy cavern into a clean, efficient food storage sanctuary. Not only will your food stay fresher and your energy bills decrease, but you’ll also extend the life of this essential appliance. So, roll up your sleeves, gather your tools, and reclaim your freezer’s full potential. When was the last time your freezer enjoyed a good, mess-free defrost?
Frequently Asked Questions
How long does it typically take to defrost a freezer completely?
|
Our Picks for the Best Refrigerator in 2026
As an Amazon Associate I earn from qualifying purchases.
|
||
| Num | Product | Action |
|---|---|---|
| 1 | GE Profile 28.7 cu. ft. 4-Door French Door Refrigerator in Stainless Steel with Dual-Dispense Autofill Pitcher PGE29BYTFS |

|
| 2 | Whirlpool WRS321SDHZ 21 Cu. Ft. Stainless Side-by-Side Refrigerator |
|
| 3 | Frigidaire EFR786 Retro Apartment Size Refrigerator with Top Freezer - 2 Door Fridge with 7.5 Cu Ft of Storage Capacity, Adjustable Spill-Proof Shelves, Door & Crisper Bins, Black |
|
| 4 | GE GTS18HGNRWW 28 Inch Top Freezer Refrigerator with 17.5 Cu. Ft. Capacity, Reversible Hinges, Gallon Door Shelves, Adjustable Glass Shelves, Frost Free |
|
| 5 | Frigidaire, 2 Door Apartment Size Refrigerator/Freezer Combo, 7.5 cu ft, Platinum Series, Stainless, 23" D x 21.5" W x 55.5" H |
|
| 6 | Frigidaire, 2 Door Apartment Size Refrigerator with Freezer, 7.5 cu ft, Adjustable Spill-Proof Shelves, Crisper Bins, Platinum Silver, Garage Ready |
|
| 7 | ARCTIC CHEF Mini Refrigerator, Compact Freezer Compartment, Adjustable Thermostat Control, Reversible Door, Ideal Fridge for Dorm, Office, Apartment, Platinum Stainless, 3.2 Cubic Feet |
|
| 8 | Electactic Mini Fridge 130 Can Beverage Refrigerator Cooler, 3.2 Cu.Ft Drink Fridge for Soda Wine Beer, Adjustable Temperature Control for Home Office, Black |
|
| 9 | Samsung 17.5 cu. ft. Smart Counter Depth 3-Door French Door Refrigerator, Stainless Steel, RF18A5101SR/AA |
|
| 10 | NEWBULIG Mini Fridge with Freezer 3.2 Cu.Ft Small Refrigerator for Office, Dorm, Small Fridge with Adjustable Thermostat, Energy Saving, Singel Door, Black |
|
The defrosting time can vary significantly, ranging from 2 to 24 hours. This depends on factors such as the amount and thickness of ice buildup, the chosen defrosting method, and the ambient temperature of the room. The natural power-off method is the slowest, while using hot water or a fan can accelerate the process.
Can I use a hairdryer to defrost my freezer for quicker results?
No, it is strongly advised against using a hairdryer or heat gun to defrost a freezer. This poses a significant risk of electric shock due to the proximity of electricity to melting water. Furthermore, the intense, localized heat can easily damage or warp the plastic interior of your freezer, leading to costly repairs.
What should I do with my frozen food while my freezer is defrosting?
For short defrosting times (a few hours), transfer your frozen food to insulated coolers packed with ice, ice packs, or frozen gel packs. For longer periods, consider asking a neighbor if you can temporarily store items in their freezer, or use a separate backup freezer if available.
How can I prevent ice from building up so quickly in my freezer?
To minimize ice buildup, ensure your freezer door seals are in good condition and close tightly. Always seal food properly in airtight containers or freezer bags to prevent moisture release. Avoid leaving the freezer door open for extended periods, and make sure not to overload the freezer, as this can impede airflow and door closure.
What’s the best cleaning solution to use after defrosting my freezer?
A simple yet effective cleaning solution is a mixture of one tablespoon of baking soda in four cups of warm water. This solution cleans thoroughly, removes any lingering odors, and is safe for appliance interiors. After cleaning, wipe down all surfaces with a clean, dry cloth until completely dry before restarting your freezer.